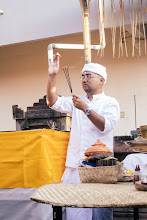
Step 2.
Use Unsharp Mask tools to more sharpen your photo, if your photo not to sharp.
In this photo, i used the amount 100 and radius 1px
Step 3.
Create duplicate layer from background and rename as cloud, then use filter-render-clouds to create smoke effect to the photo
Step 4.
Coloring the smoke with yellow to give warm effect to the smoke, I used color balance on image adjustment on this step
Step 5.
Change the Cloud layer Opacity to 81% and Fill to 51%
Change the Cloud layer Opacity to 81% and Fill to 51%
Step 6.
Use your creativity in deleting some smoke area on your photo
Step 7.
Create enother duplicate layer from background and name it Blur. Then use filter-blur-gaussian blur with 50px

Create enother duplicate layer from background and name it Blur. Then use filter-blur-gaussian blur with 50px

Step 8.
Change the blending option of Blur layer to Hard light. This will give more contrast light to your photo

Finish
tips by rick gondrong

 RSS Feed (xml)


2 comments:
for this step i will add some tips to this photo looklike soft and glow...after step like up there try you create duplicate layer and make layer copy (layer no.1) and blending it screen after that and less opacity till you want to your satisfy......peace
looks a bit like the midnight sepia action without the sepia =)
Nice job!
Post a Comment